How to Map Liquidity Zones and Order Blocks

To map liquidity zones and order blocks, define the pattern you are looking for, mark its price boundaries, record when it became identifiable, and decide what would invalidate it. The result is a map of areas to investigate—not a view of every pending order or a guarantee that price will reverse.
Start in LuxAlgo charts with price and volume context. Use drawings to record candidate zones, inspect available order-flow data, and ask Quant, our coding agent, to turn a precise mapping rule into an indicator or testable strategy.
Liquidity zones, order blocks, and order-flow data
Traders use “liquidity zone” for several different ideas. Keeping them separate makes a chart easier to interpret:
| Map or data | What it describes | What it cannot establish alone |
|---|---|---|
| Estimated liquidity zone | An area near repeated highs, lows, or other reference levels where traders hypothesize orders may cluster. | The number, size, identity, or current availability of those orders. |
| Order block | A price region selected by a particular candle-and-structure rule, often around the move preceding a breakout. | That an institution entered there or must defend the region. |
| Volume profile or footprint | Historical trading activity within the data source and measurement window. | The complete inventory of unfilled orders or a certain future reaction. |
| Displayed order book | Visible resting bids and offers on the covered venue at that moment. | Hidden liquidity, every venue, or whether displayed orders will remain available. |
A high-volume area and a suspected stop cluster are therefore different observations. A wick through a previous high may meet your definition of a liquidity sweep, but the candle alone does not prove who caused it or why. Likewise, an order block is a technical interpretation; its label is not evidence of a named participant’s positions.
Four steps to map zones consistently
1. Choose the market, session, and timeframe
Record the exact symbol and venue, chart interval, session, and data source. Choose a timeframe that fits the holding period you want to study. A daily chart can provide broader context for a shorter-term setup, but it is not automatically more reliable than an hourly chart.
If you use two timeframes, define their roles: for example, completed hourly bars identify candidate areas while five-minute bars determine entries. Do not use the final high, low, or close of an unfinished hourly bar as if it had already been known.
2. Define the boundaries before evaluating the result
For a price-based liquidity map, choose a repeatable rule for similar highs or lows: the allowed price distance, required contacts, minimum separation between contacts, and confirmation delay. “These highs look equal” is too subjective for a consistent backtest.
For an order-block map, one possible convention selects the last bearish candle before an upward move that closes above a previously identified swing high. Mark that candle’s full high-to-low range. Reverse the rule for a bearish candidate. Other methods use candle bodies, different swing definitions, or several candles; choose one method and keep it fixed.
Specify what counts as a swing and how many bars are needed to confirm it. A zone may be drawn back over its source candle only after the breakout occurs. Record the later detection time and do not count earlier visits as trades you could have taken.
3. Record supporting evidence and competing interpretations
Note whether a candidate overlaps a previous session level, a range boundary, or a measured high-volume area. Record the same observations for zones that fail. Several indicators calculated from the same prices do not necessarily provide independent evidence.
LuxAlgo’s volume profiles help organize traded volume by price. Session and Rolling profiles use footprint data where supported; Visible Range Volume Profile uses candle volume with an up/down classification. Its range changes when you pan or zoom. Fix the measurement window for comparisons, and avoid applying a completed session’s final profile to decisions made earlier in that session.
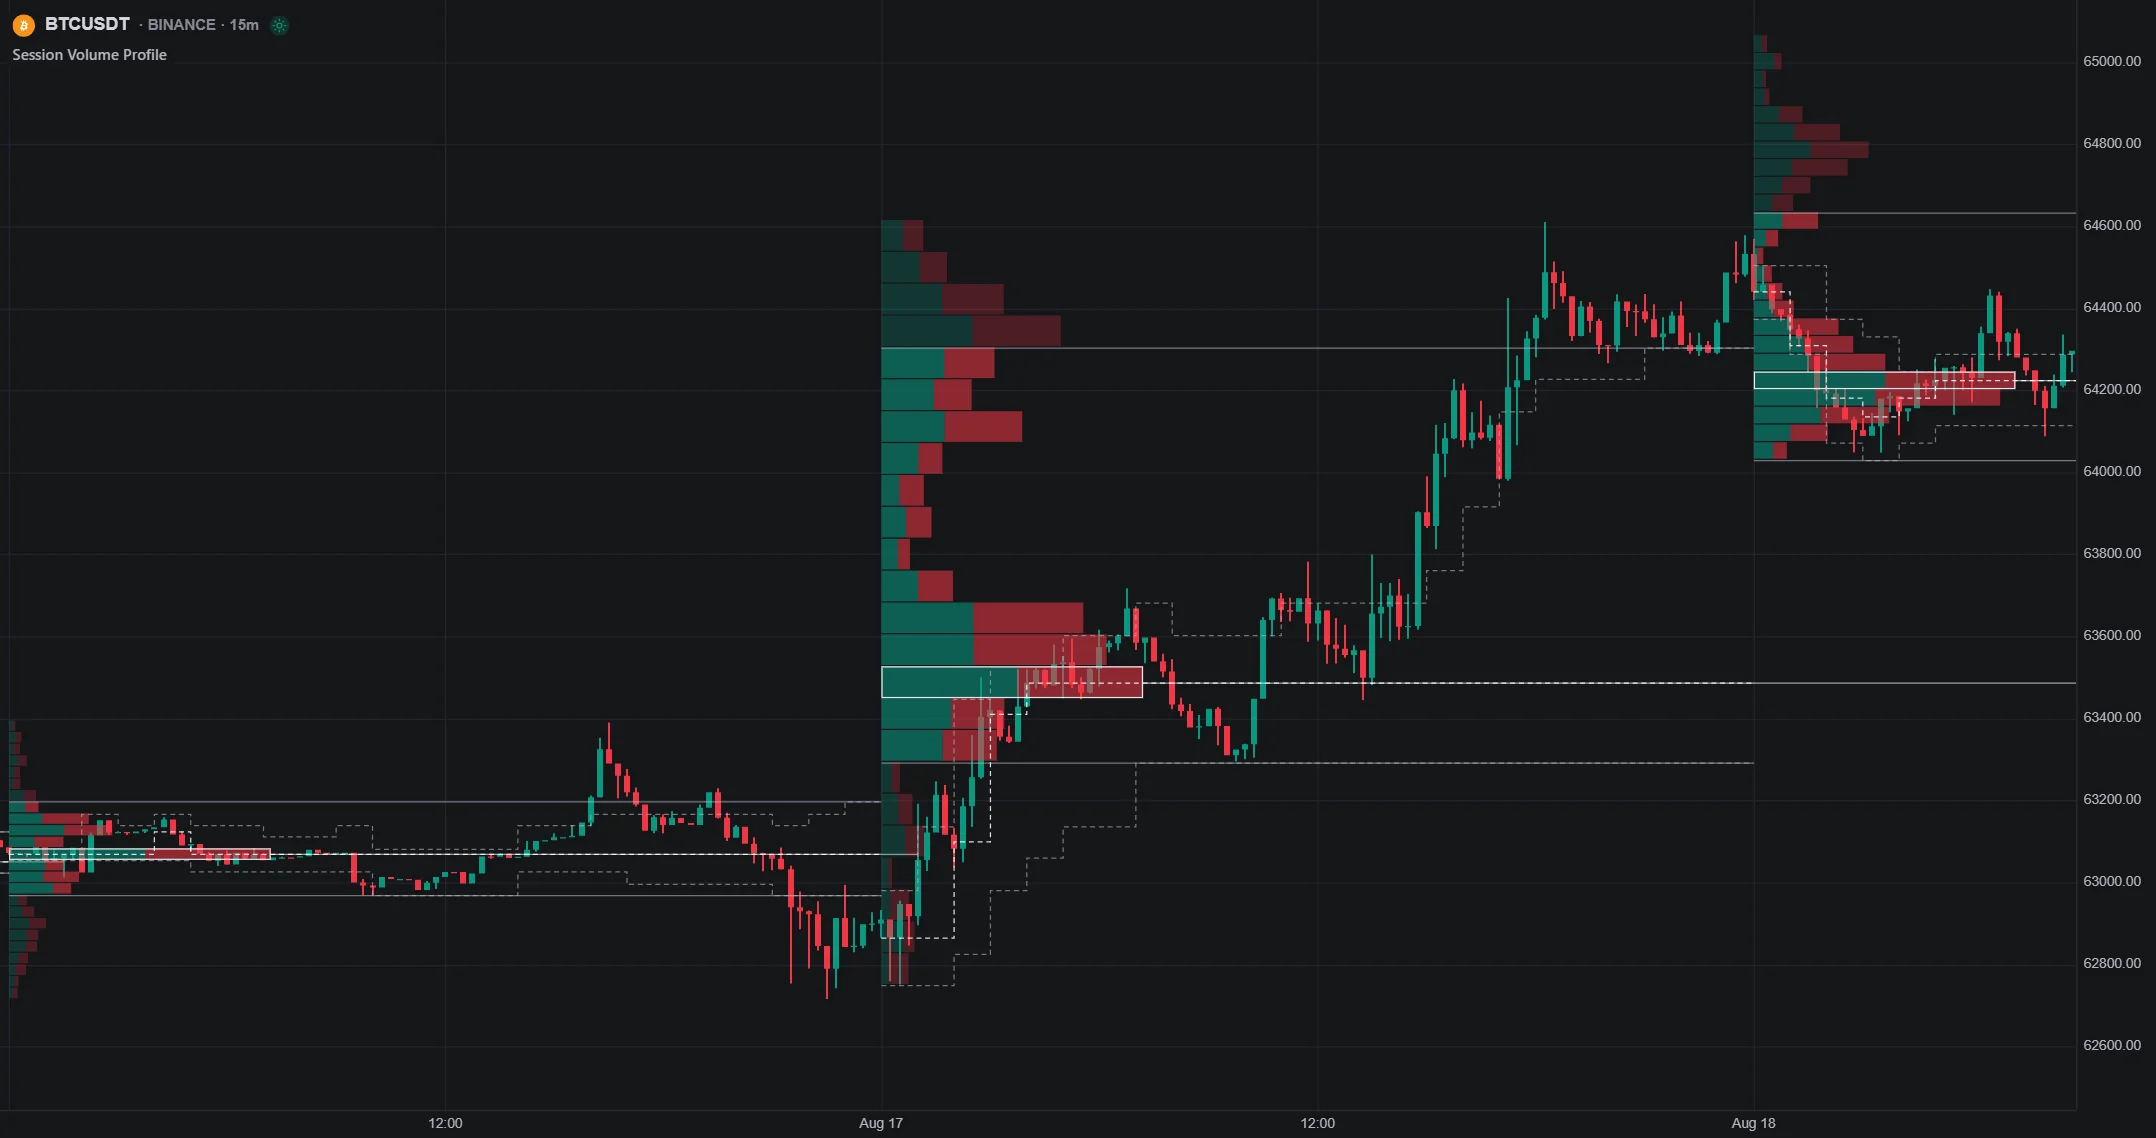
4. Define the zone’s lifecycle
Write down when the zone becomes eligible, what counts as a retest, how many attempts are allowed, and when it expires. Specify whether invalidation requires a wick through the far boundary or a completed close beyond it. These choices produce different signals.
Do not redraw a failed zone to make the earlier forecast look correct. Repeated tests can be useful observations, but “more touches means stronger” is a hypothesis to test, not a universal rule. Preserve failed, expired, and untouched zones in the review log.
Worked example: mapping a bullish candidate
Consider a hypothetical stock chart. A previously confirmed swing high is $102. A bearish candle spans $99 to $100, and a later bar closes at $103. Under the full-candle convention above, the $99–$100 area becomes a bullish order-block candidate only when the qualifying breakout closes.
Suppose a later retest enters that area and closes back above $100. An illustrative entry policy could buy at the next bar’s open, provided the setup has not expired or been invalidated. If the actual fill is $100.50, a protective stop at $98.50 creates $2 of planned price risk per share. A $100 risk budget allows 50 shares before costs, with $5,025 of purchase exposure.
A target at $104.50 offers $4 per share, or 2R before costs. That arithmetic does not establish profitability: with fixed 2R wins and 1R losses, the gross break-even win rate is one-third, and costs raise it. If price gaps through the stop and fills at $97, those 50 shares lose $175 before costs instead of the planned $100.
This example explains mapping and sizing, not a complete proven strategy. Before testing it, also define the swing-confirmation rule, maximum wait for a retest, expiry, session cutoff, position overlap, and what to do when both stop and target occur inside one historical bar. For contracts, include contract size and the cash value of a price move; share arithmetic does not transfer unchanged.
Inspect executed order flow at the zone
On supported symbols, LuxAlgo’s Footprint view displays volume at prices within each bar, split by aggressor side. It is built from pre-aggregated one-minute slices and grouped for the chart interval. You can inspect a row’s price range, bid/ask volume, and delta, or hold Shift while hovering to magnify nearby cells.
Aggressive buying can accompany either continuation or a failed advance. Interpret the price response as well as the volume, and test any entry condition you derive. Missing coverage should remain a data limitation, not be treated as zero trading activity.
Automate a defined mapping rule with Quant
Once your zone definition is precise, use Quant’s strategy workflow to describe detection, entry, exit, sizing, and timing. Ask it to expose the relevant parameters and mark the first bar on which each zone becomes known. Review the generated code and compare several detected zones with your manual record before trusting the test.
Run the strategy on the intended symbol and interval, configure realistic costs, and inspect its trade log and performance results. Check losing examples and missed signals, then evaluate a later period that was not used to tune the rules. Verify that any data required by your design is actually available to the script; a chart visualization does not by itself prove backtest access to that data.
For an existing overlay, the Library’s Order Block Detector uses volume pivots and its own mitigation settings, which determine its output. Do not assume every indicator uses the illustrative full-candle convention in this article, or that its volume labels identify institutions.
Free tools for estimated liquidity zones
LuxAlgo’s open-source Liquidity Pools indicator estimates zones using wicked highs and lows, repeated contacts, spacing, and confirmation bars. Its displayed volume allocates candle volume according to the portion overlapping a zone; it is not an order-book count.
Use its documented settings to understand when a zone first appears. Compare that detection time with the apparent historical starting point before evaluating a trade. Treat the output as a consistent mapping aid, then assess whether your separately defined trading rules have useful results after costs.
FAQs
How do I mark an order block?
Choose a precise convention. One example marks the full high-to-low range of the last bearish candle before a qualifying upward structure break, with the reverse for bearish candidates. Record when the break confirms the zone, and define its invalidation rule.
How can I spot liquidity zones in trading?
Start with defined reference areas such as repeated highs and lows, then record contacts, spacing, and confirmation timing. Volume profiles can add historical trading context. These observations estimate potential areas of interest; they do not reveal every pending order.
What timeframes work best for order blocks?
There is no universally best timeframe. Choose intervals suited to the holding period and data available, use only information known at the decision time, and compare results using consistent rules and realistic costs.
How do order blocks differ from liquidity zones?
An order block is a region selected by a candle-and-structure rule. A liquidity zone is a broader label for an area where orders are hypothesized to cluster. Neither chart label alone verifies institutional positions or resting order quantities.
What is an order block zone?
It is the price interval assigned to a detected order-block pattern. Its boundaries and detection time depend on the chosen method. Traders may investigate it as potential support or resistance, but a subsequent reaction is uncertain.
Read next