Supply and Demand Zones: Identifying Critical Areas for Trading Success
Supply and demand zones are price areas traders mark around a base or other structure that preceded a strong move. A demand zone is a candidate area for buying interest on a return; a supply zone is a candidate area for selling interest. They help organize entries, invalidation, and targets, but a rectangle on a chart does not reveal unfilled institutional orders or guarantee a reaction.
The useful question is not simply whether a zone looks convincing. It is whether you can define the zone before a trade, recognize the same setup consistently, and evaluate its results after costs. LuxAlgo brings that process into a charting and AI platform: mark areas on Quant Charts, examine price and volume, and work with Quant, our coding agent, to build a strategy from explicit rules.
- Find the structure: distinguish a base followed by a rally from one followed by a decline.
- Fix the boundaries: record which candles, bodies, or wicks define the zone.
- Wait until it exists: the departure move must occur before its base can be classified using that move.
- Plan failure: define invalidation, position size, and what happens after a zone breaks.
Finding Supply and Demand Zones
Price patterns: RBD and DBR
Rally-Base-Drop (RBD) describes a rise, a consolidation, and a subsequent decline. Traders may mark the base as a supply zone. Drop-Base-Rally (DBR) describes a decline, a consolidation, and an upward departure; its base becomes a demand-zone candidate. Rally-Base-Rally and Drop-Base-Drop describe continuation variants.
These names describe the observed sequence. They do not identify who traded, whether a base represented accumulation or distribution, or how many orders remain. A base can be defined using full candle ranges, candle bodies, or a selected portion of the structure, but those choices produce different boundaries and trade results.
Make zone boundaries repeatable
Write down a definition before scanning outcomes. For example, an illustrative demand-zone rule could use three consecutive base candles whose combined highest-high to lowest-low range is no more than one 14-period Wilder ATR, measured at the last base candle. Require the next completed candle to close above the base high and have a real body at least that same ATR. The zone spans the three base candles' lowest low to highest high and becomes known only at the departure candle's close.
This example defines a base-and-rally candidate; a full DBR model additionally needs a numerical definition of the preceding decline. It is a research convention, not a universal zone formula. Record a formation timestamp, freeze the boundaries, and specify when the zone expires. Otherwise, later chart edits can make old trades look easier than they were.
Volume analysis for evaluating zones
| Observation | What it describes | What it does not establish |
|---|---|---|
| High volume during departure | More trading activity than the chosen comparison period | That the zone will hold on a return |
| Declining base volume | Less recorded activity during consolidation | Hidden institutional accumulation or distribution |
| Volume concentrated near a price | Where executed activity accumulated within a specified window | The quantity of resting orders still available there |
| Above-average relative volume | Activity relative to a defined baseline and session | A universal increase in strategy reliability |
Define the baseline, venue, and session before comparing zones. Stock volume from one exchange differs from consolidated market volume, and crypto volume belongs to the selected venue. Intraday volume also varies by time of day. Compare a volume-filtered strategy with an otherwise identical unfiltered version to see whether the filter contributes useful evidence.
Zones vs Support and Resistance
Supply/demand analysis and support/resistance analysis overlap. Both identify prices where a future reaction is worth studying. Support and resistance can be drawn as areas rather than exact lines, so width alone is not a reliable distinction. Fidelity's guide to support and resistance explains the role-reversal idea: a former resistance area may later act as support, and vice versa.
| Comparison | Supply/demand approach | Support/resistance approach |
|---|---|---|
| Typical reference | A base and departure, or a particular zone-calculation method | Prior highs/lows, repeated reactions, trendlines, or other specified levels |
| Boundary | A defined price interval | A level or interval, depending on the method |
| Entry | Touch, rejection, or another stated trigger | The same entry families can be used |
| Reliability | Must be evaluated for the chosen rules and market | Must be evaluated on comparable terms |
Neither method is inherently more dependable, nor are zones automatically best in volatile markets and levels best in ranges. Wider areas may require wider stops and smaller positions. Scaling into an area also adds exposure; multiple entries should share a predefined total risk budget rather than each receiving a new budget.
Trading with Supply and Demand Zones
Reversal trade methods
A reversal approach looks for a reaction when price returns to a known zone. A touch entry can participate immediately but may buy or sell into a continuing move. A close-based rejection waits for more information, potentially at a less favorable price. A candlestick pattern, Fibonacci reference, or volume condition is an optional filter to test rather than proof of a reversal.
For a demand zone from $98 to $100, one rejection definition is a completed candle that trades inside the zone and closes above $100. Decide beforehand whether any move below $98 invalidates the setup or whether invalidation requires a close. A wick-based invalidation rule cannot simultaneously count a deeper wick below the zone as a valid rejection.
False-breakout and reclaim setups
A false-breakout strategy deliberately allows a boundary breach, then waits for a reclaim. It therefore needs different invalidation rules from a first-touch strategy.
| Setup | Illustrative signal | Risk reference |
|---|---|---|
| Bear-trap reclaim | Price trades below a demand zone, then a completed candle closes back above a specified boundary | The reclaim structure's low, with a defined buffer |
| Bull-trap rejection | Price trades above a supply zone, then closes back below a specified boundary | The rejection structure's high, with a defined buffer |
Specify whether the reclaim must occur on the same candle or within a fixed number of later bars, and enter only after the required information is available. “Trap” describes the resulting price sequence; it does not prove that an institution engineered the move. Short trades also require attention to borrow availability, fees, and their different risk profile.
Continuation trade methods
Continuation setups include returns to a demand zone during an uptrend, returns to supply during a downtrend, and a break followed by a retest from the other side. Define the trend separately, along with the breakout close, retest tolerance, expiry, and rejection trigger.
A daily chart can provide context, a four-hour chart can describe an intermediate structure, and a one-hour chart can supply an entry trigger. That sequence is an example rather than a requirement. Use completed higher-timeframe information; the eventual daily close is unavailable earlier in that day. More timeframes do not automatically produce stronger evidence.
The next opposing zone can be a target reference, but it must have been identifiable when the target was selected. Compare its distance with the planned stop and costs. A visually attractive target does not mean price will reach it. For a related entry framework, see breakout trading with support and resistance.
Position size around zone invalidation
Suppose a demand-zone rejection leads to an actual entry at $100.50 and a planned stop at $97.50. The risk distance is $3 per share. A $120 planned risk budget allows 40 shares before costs, with a position value of $4,020. A target at $106.50 represents $6 per share, or 2R and $240 gross profit, if the entire position exits there.
If an adverse opening move leads to a $95.50 exit, the loss is $200 before costs, exceeding the planned $120. Position value, planned stop risk, and actual loss are separate quantities. Allow for costs, round to permitted size, and cap exposure by available buying power. Contract-based instruments also require the correct point value and currency conversion.
The SEC's stop-order bulletin explains why a stop price is not a guaranteed fill and why a stop-limit order can remain unfilled. Wider stops should not become a reason to retain the same position size or loosen risk after entry.
Use LuxAlgo to Research Zones
Chart zones and volume together
Start on Quant Charts with your symbol, session, and timeframe, then mark the candidate area using native drawing tools. For a volume-based alternative, the Library's Supply and Demand Anchored indicator estimates areas over a chosen start and end window and can be opened on Quant Charts.
Its threshold, resolution, and intrabar timeframe affect the calculation. Moving an anchor recalculates the areas. This is a distinct method from manually identifying an RBD or DBR base, and its final window must not extend beyond the historical decision you are evaluating.
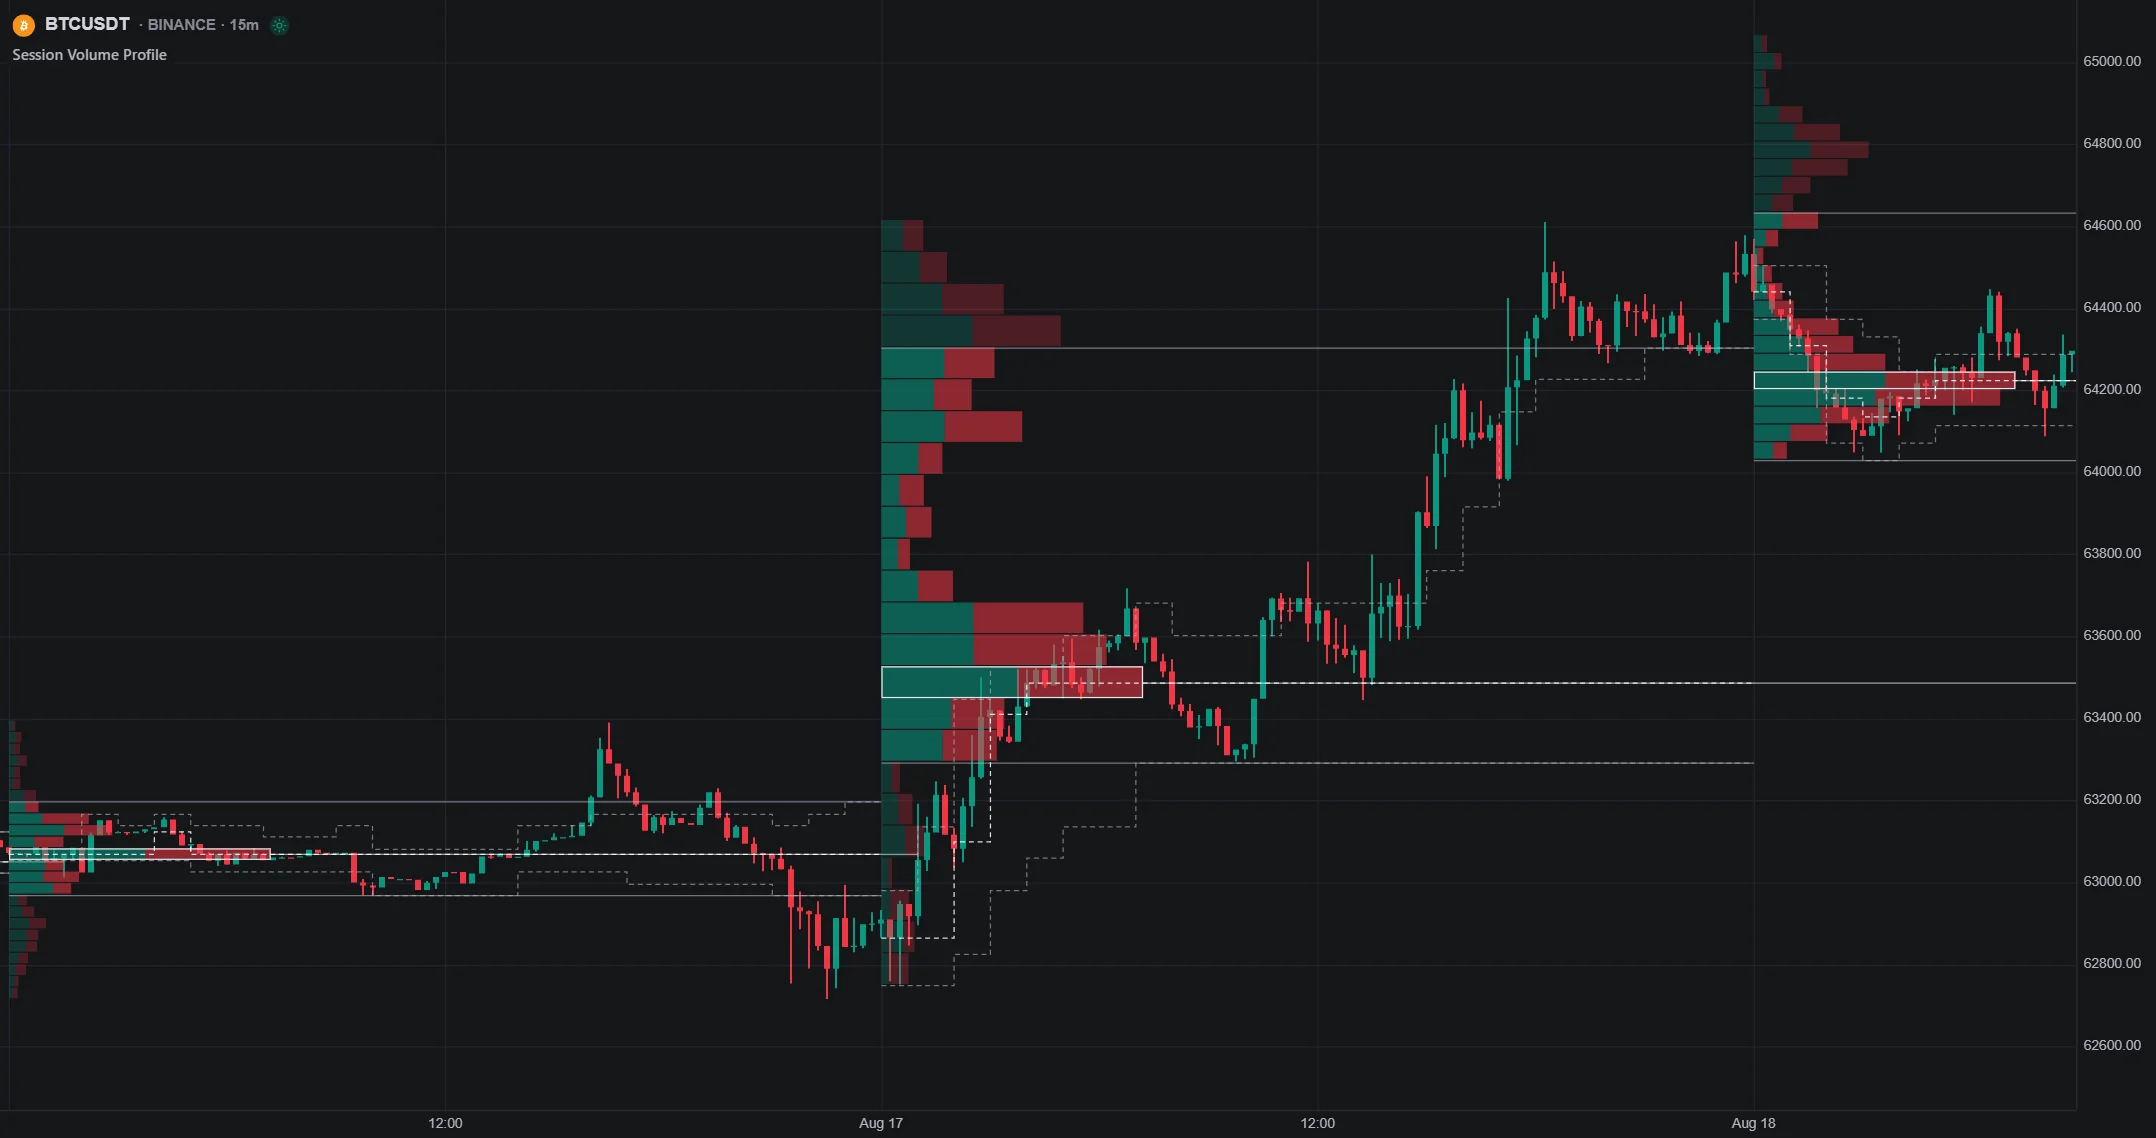
Native volume profiles offer session, rolling, and visible-range views. Session and rolling profiles need footprint data; the visible-range version uses candle volume with an up/down-bar split. Visible-range results change when the chart view changes. In historical analysis, use prior completed-session levels or developing values available at the time, not a session's eventual final profile.
Inspect traded activity at a zone
On supported symbols, footprints show executed volume at prices inside each candle, separated by aggressor side. The chart type and overlay options help examine how activity changes near an area. They do not disclose participants' identities, resting liquidity, or whether a future retest will succeed.
Keep tool methods distinct
The Library’s order-block tools on a Quant Chart use swing-based construction and configurable mitigation methods, including close- and wick-based conditions. Those settings are not interchangeable with a manually drawn base, an anchored volume area, or native footprint data. Check when a block becomes known and when it disappears, particularly with multi-timeframe calculations.
Test zone rules with Quant
Use Quant, our coding agent, to turn a specific zone definition into a strategy. Describe formation, the earliest tradable return, entry, invalidation, expiry, exits, and position sizing. For the three-candle base example, distinguish the departure candle that creates the zone from later candles allowed to test it.
- Specify zone handling: decide which zone takes priority when several overlap, whether only the first return is eligible, and whether a traded or broken zone is retired.
- Specify timing: make completed-bar signals actionable at the next modeled execution opportunity. Do not use a zone before its formation or apply a later swing confirmation to earlier trades.
- Review the generated code: inspect example entries and failed zones, not only successful bounces. An indicator conversion still needs explicit trade rules.
- Evaluate consistently: include commission, slippage, session, and position limits; inspect individual trades and drawdown in the native backtest viewer. Reserve a later period for evaluation and track how many variations you tested.
A saved strategy run can preserve the script, symbol, timeframe, inputs, and simulation properties. Historical results remain simulations, and a strategy that runs without errors can still contain an unrealistic zone or execution assumption.
Top Trading Mistakes to Avoid
- Using a universal zone width: a 1–3% band is not suitable for every asset or interval. Define width from the selected structure and evaluate any volatility adjustment consistently.
- Reading identity into volume: a spike indicates recorded activity, not proof of institutional accumulation. OBV is a cumulative signed-volume measure; VWAP is a volume-weighted price reference. Neither proves who is trading.
- Changing anchors after seeing the result: save the original boundaries and formation time. Record failed zones instead of moving the rectangle until it fits.
- Treating every retest as a fresh trade: repeated touches can overlap and produce correlated outcomes. Define eligibility and total exposure before adding entries.
- Confusing timeframe context with confirmation: higher-timeframe information can help frame a hypothesis, but must have been available at the entry and should be tested for its contribution.
Track the Evidence and Keep Learning
Keep a journal with the original zone boundaries, formation and entry times, signal, stop, intended target, costs, and eventual result. Attach a chart captured when the decision was made. Separate a failed rule from a trade that did not follow the rule, and compare reversals, continuation trades, and reclaim setups separately.
LuxAlgo's built-in Journal supports recording trades and notes alongside chart analysis. For additional visual study, the original JeaFx supply-and-demand tutorial presents an independent trading method. Treat its examples as ideas to evaluate; they are not documentation of current LuxAlgo features or evidence of expected returns.
FAQs
How to identify a trading zone?
Choose a repeatable definition, such as a specified base followed by a completed directional departure. Mark the exact upper and lower boundaries, record when the zone became known, and define its expiry and invalidation. RBD and DBR are useful pattern descriptions, but price and volume alone do not prove institutional orders remain. Evaluate later reactions using clear entry, exit, and risk rules, including failed zones.
References
Read next